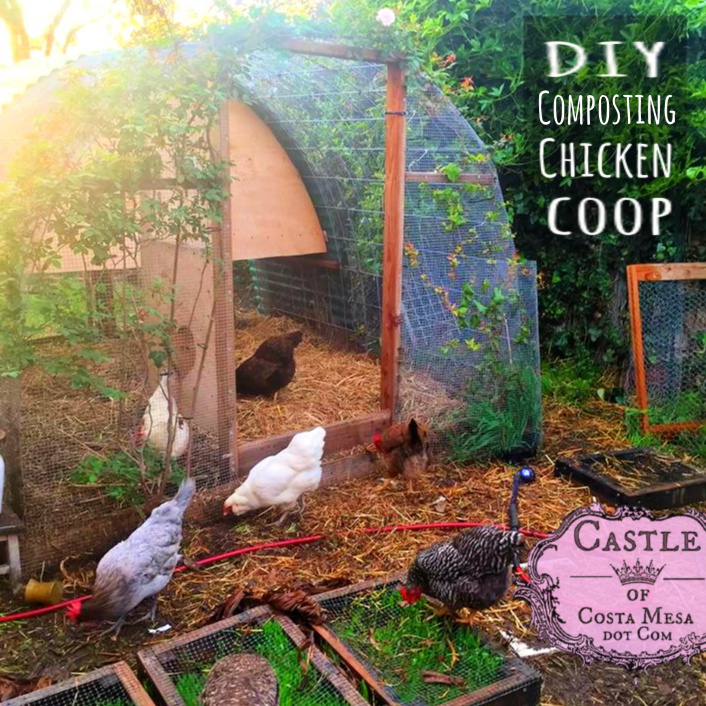
Wednesday, June 6, 2018. My heart was broken for some time. So I wept, made dolls and needle-felted. Surprisingly, my heart healed! Suddenly, I stopped all needle-felting to grow an urban organic food forest for my family. We decided to grow chickens. So I designed a coop for them. My children helped me build the coop. This is our story. I hope you can use our design, improve upon it and build yours. If you do so, please share with me, we would love to see it!
love, from our garden to yours! Jzin
Our garden is in Costa Mesa, (Orange County), Southern California, Zone 10B, 10 minutes or so from the Pacific Ocean. We live in an urban residence with a lot size of 6,720 sq foot, including the house, garage and various cemented areas.
You can follow us on Instagram: @CastleofCostaMesa
Feel free to support our endeavors by buying a poster or some handmade goodies from our Castle of Costa Mesa Etsy shop. Thank you!
Table of Contents
- What I needed my Chicken Coop to do
- Shad’s video on Active Decay Cycle Chicken coop. It’s the bomb!
- Materials and Tools
- Summary of Steps
- Specifications
- Steps
- Building the Base/Frame
- The Front of the Chicken Coop
- Hen house: Windows for Egg Collection
- Installing Corrugated Roof for the Hen House
- Roosting Bars and Nesting Boxes inside the Hen House
- Deep Bedding: Soil Fertility, Composting Heat in Winter, Low Maintenance
- Growing Vines over Chicken Coop for Beauty, Shade, Bugs and Foods
- How is my coop doing now? Updates
What I needed my Chicken Coop to do
These were my goals for my DIY chicken coop!
- Organic, non toxic.
- To protect the chickens from predators such as mice, rats, garden cats, opposums, possible coyotes in the City of Costa Mesa.
- Southern California summer heat wave. To provide cool shade, good air flow.
- Sunshine, fresh air: good ventilation.
- A vision of romance and beauty!
- This coop is designed to be an organic compost generating machine. We want our chicken coop to make compost for our garden. Shad in Guatemla presents the BEST video on Youtube (below) on active decay cycle chicken coop. Wide and easily accessible doors to make harvesting finished compost easy: roomy front door, back gates swing out for easy access to that black gold!
- Low maintenance. Coop can confine deep bedding. With deep bedding, I do not have to clean the coop daily (or ever).
- A coop that is cool in the summer and warm in the winter: In winter, we will pile lots of hay and composting matter right under the hen house. Composting chicken coop generates heat in winter: warmth for chickens, by spring we can harvest ready compost for the garden.
- Protect my hens from winter rain.
- A heat source (compost beneath the hens) to keep the hens warm in winter.
- Can grow beautiful vines directly on an area fertile with chicken coop, to produce shade for chicken, beauty, eggs, fruits and veggies.
- Enough room to partition off new chickens if needed to add new members to my flock.
My other needs for the DIY building project:
- The project is to allow each child to actively participate in designing and building.
- Limitations: my paltry carpentry skills and materials accessible to me as an urban resident and person without a moving truck. I have to learn how to use a chop saw.
Shad’s video on Active Decay Cycle Chicken coop. It’s the bomb!
Materials and Tools
- Back to Table of Contents
- The Frame of the coop
- 4 pieces of 9 foot long, 2×6 untreated redwood lumber to make the 9′ x 9′ square shaped base for coop.
- 2 pieces of 8 foot long, 2×6 untreated redwood lumber to affix the cattle panels to, making an arch.
- 2×2, 2×4, 2×6 redwood lumber for …
- door frame
- front door, back doors
- high threshold to keep the deep litter inside the coop
- horizontal support braces for the front of coop
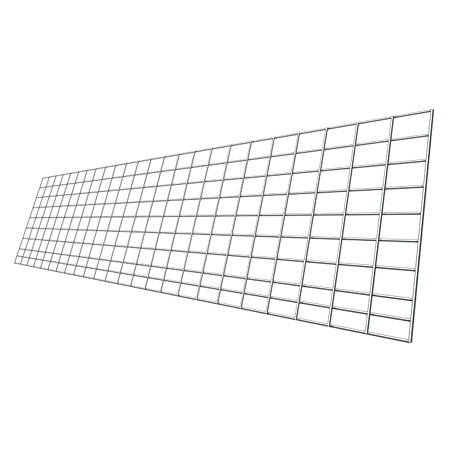
- Two 16 foot long cattle panels from Tractor Supply Store in Norco, Southern California
- Are you kidding me? Friends don’t let friends get just two cattle panels. You need at least 16…feast your eyes on this video that will turn you to a cattle panel enthusiast: Gorgeous Roots and Refuge Cattle Panel Arches video.
- How to haul these babies?
- Chicken wire staples
- L brackets to secure base
- Predator Prevention. Hardware cloth may be expensive but hardware cloth is your friend.
- Tons of 1/2 inch mesh size, 19 gauge steel hardware cloth from Home Depot.
- Zip ties to tie hardware cloth to cattle panels, etc
- Hen house (the bedroom of the chicken coop)
- The hen house walls:
- 2 large plywood boards as 2 walls for the hen house
- hardware cloth to predator proof
- The hen house roof:
- Corrugated roofing of a fun color, from Home Depot
- 2×2 cheap wooden beams to help secure roofing to cattle panel.
- zip ties to tie cheap wooden beams and roofing to your coop.
- Egg-harvesting window
- Optional: 2 re-purposed kitchen cabinet doors as windows for the hen house
- Springs to keep the egg-harvesting windows shut to prevent predators entering.
- Roost Bar for chickens to perch and sleep on:
- One or Two (depending on how many hens you have) 9 foot long beams or branches. You can use 2×2 redwood lumber or a rounded moringa tree trunk for the hens to perch on to sleep.
- tiny pieces of thin plywood as tabs at the end of the roost to enable roost to be hung on the coop walls.
- The hen house walls:
- Ongoing materials for deep-litter coop flooring.
- See Deep Bedding: Soil Fertility, Composting Heat in Winter, Low Maintenance
- to cut to the punch line, make sure you have a lot of “brown”=carbon-rich materials (dry leaves, yard trimmings from your organic neighbors, wood-chips, straw, etc) to cover your nitrogen-rich scraps so you do not attract flies.
- Learning curve
- Tons of Youtube videos on how to do basic constructions
Tools
- Power drill
- Chop saw borrowed from Patrick
- to cut lumber, corrugated roofing
- Jig saw to cut curvy shaped hen house walls, doors.
- It looks like this on Home Depot, even though I bought a $5 one from garage sale, not exactly like this one.
- Hammer
- Screws
- Zip ties to secure hardware cloth. I LOVE zip ties!!!
- wire cutter to cut hardware cloth.
- Scissors/wire cutter to cut hardware cloth, zip ties
- A good pal with a truck who is willing to help you haul stuff home.
- 2 large plywood boards for hen house
- 2 cattle panels
- 9 ft lumbers.
- uncut 10 foot corrugated roofing
- etc
Summary of Steps
- Build the square base/frame
- Erect cattle panels
- Build door frame
- Predator-proof the coop. Cover all entrance points with hardware cloth
- Bury hardware cloth down perimeter of coop to prevent burrowing predators.
- Drape the coop with hardware cloth, secure with zip ties.
- Check that there are no small holes that could allow the entrance of snakes, mice, etc to enter coop.
- Build the door
- Hen house: build the roosts
- Hen house: windows for egg collection
- Build nesting boxes.
- Attach corrugated roofing from the ground up to the other side
- Coop flooring: Plan and Layer in your deep bedding
- Plant vines for romance, shade, food or attracting june bugs as chicken food.
- Chicken water and fodder
- Chicken run: Our chicken free-ranging areas: open space, chicken run, chicken moat, chicken forest, forbidden heirloom tomato garden, vermicompost bin
- Sprouting for chicken
Specifications
- Back to Table of Contents
- Walk-in chicken coop, low roof for a short Asian woman.
- If you are other than a short Asian woman or similar to that…
- If you are tall, perhaps you could add 2 T-posts on each side of your cattle panel arch, to raise the coop higher, so you do not get bonked on the head when you are inside the coop. Remember, the level of the flooring changes through the season. The flooring is low in spring after you harvest the compost. Then you add your composting layers periodically through the seasons and hopefully by winter, your coop floor is high and the decomposition will keep your hens warm in the cold months. That said, if you are tall, you may want to raise the coop ceiling.
- I do suggest you add wire mesh as wells instead of solid wooden panels, this way you get good air flow.
- The foot print is about 9 foot x 9 foot.
Steps
Building the Base/Frame
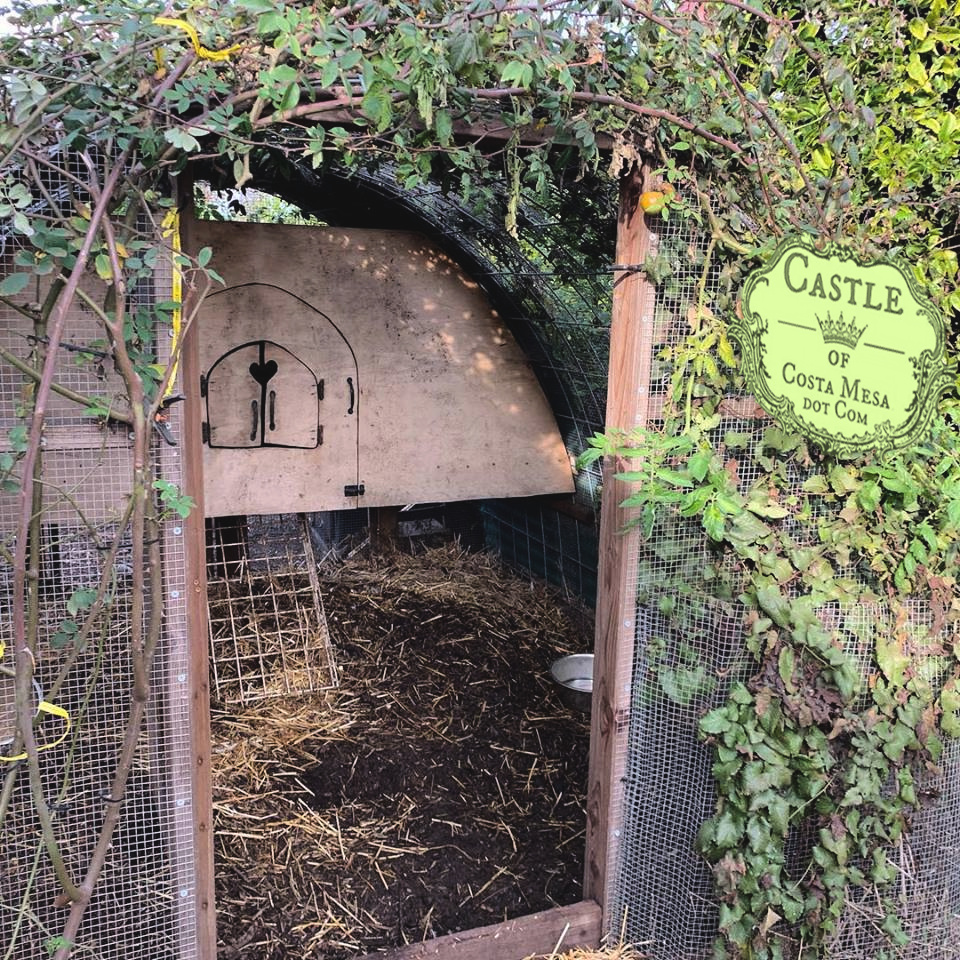
I wanted a coop with an open bottom floor so that earthworms, bugs and soil microbes could access the actively decaying compost that is the floor of my chicken coop. I also wanted carbon-rich deep bedding, so the sides(walls) and door threshold of the coop are necessary to keep the deep bedding in.
I choose to use untreated redwood lumber for nontoxic, longer-lasting coop. Treated lumber is cheaper but may contain toxic chemicals.
Sunday, April 16, 2017. We started by building a 9 ft x 9 ft redwood lumber frame as a base for our coop (not shown).
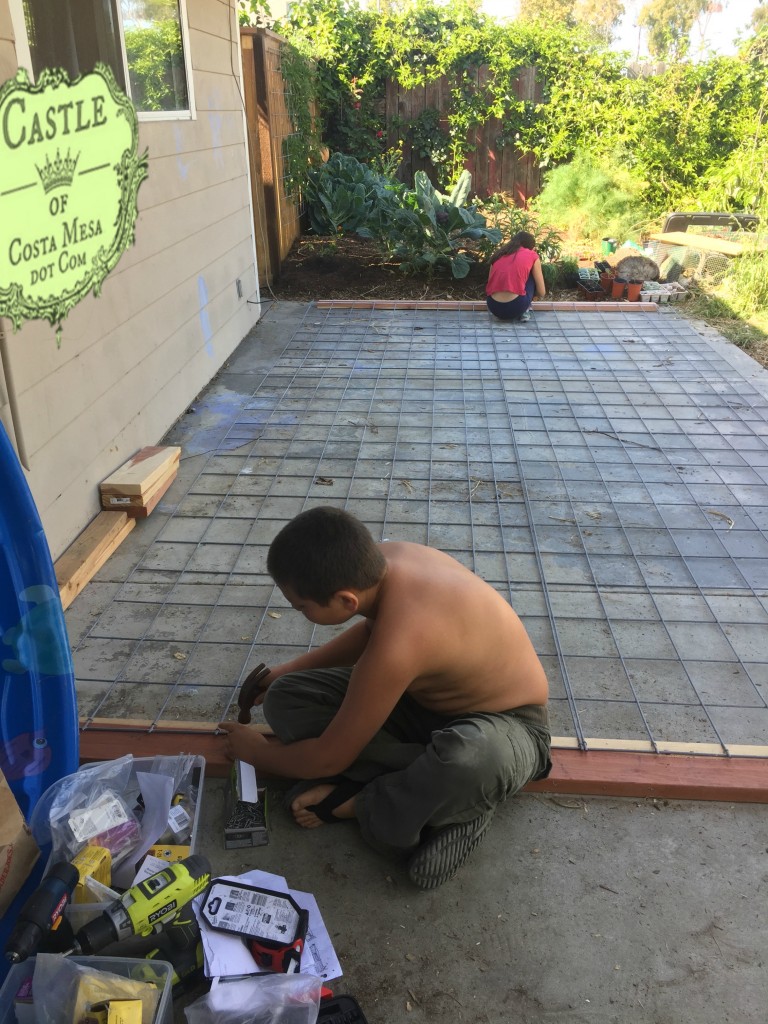
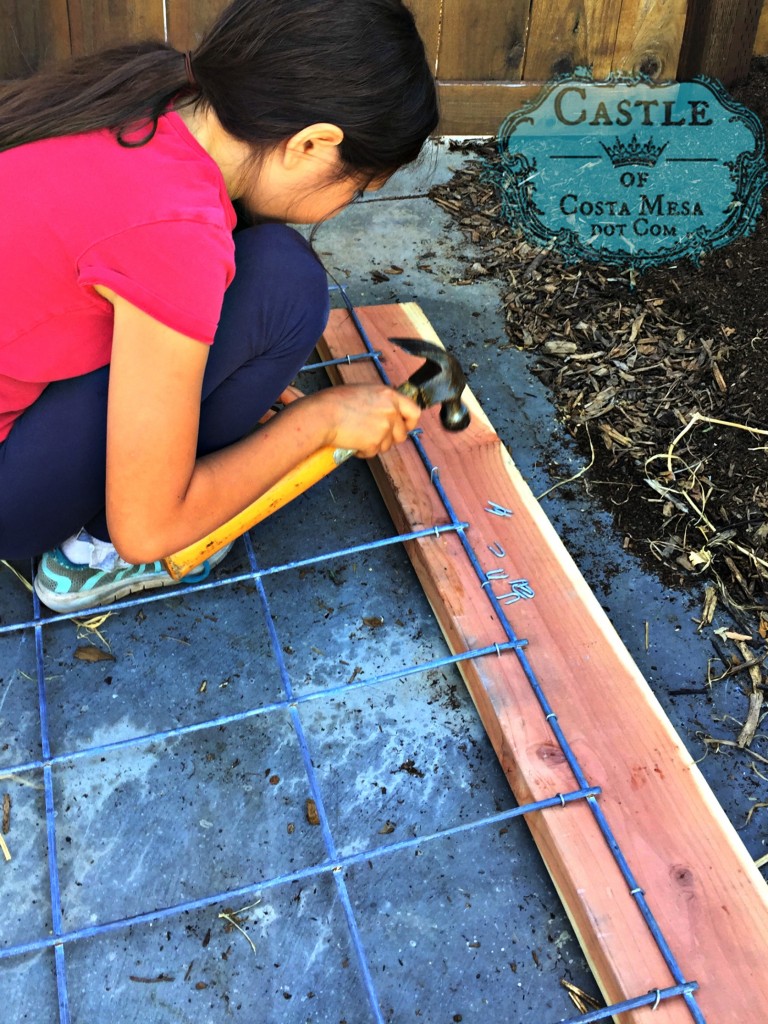
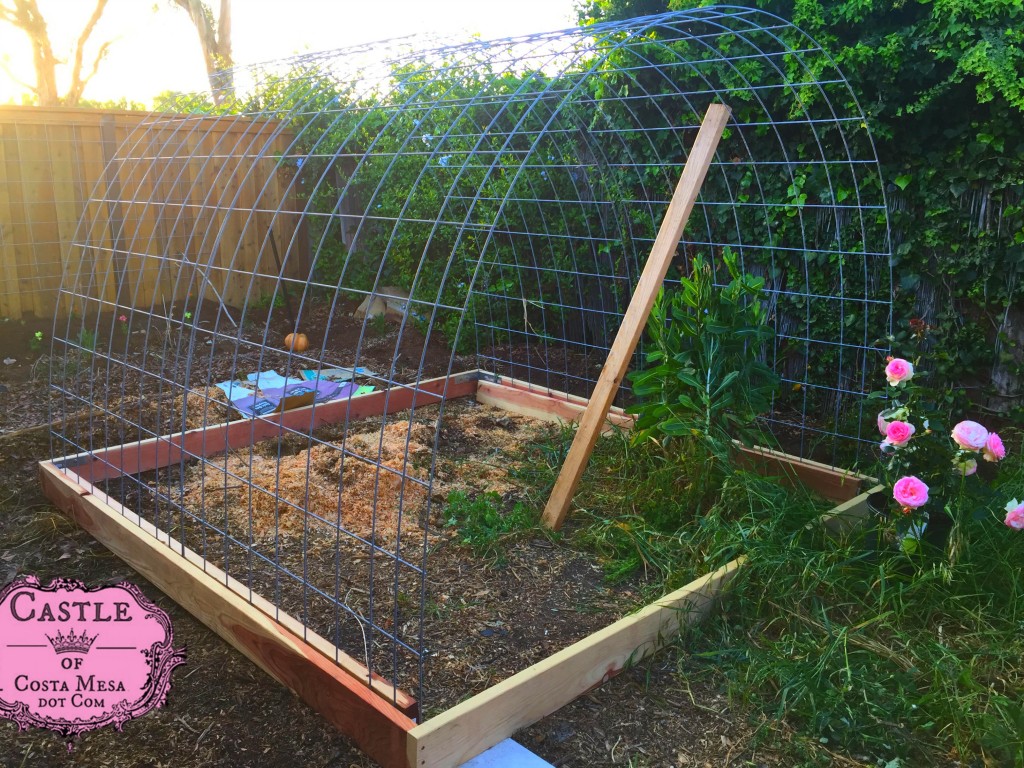
Photos: My children V, E and D helped attach the 2 cattle panels, arranged side by side, to two additional pieces of 2 x 6 redwood lumber.
We used two of these cattle panel fencings from Tractor Supply Company, 16 ft long x 50 inches height.
Nunu attaching cattle panels to 2 x 6 untreated redwood lumber using 3/4″ poultry net staples.
Joyful day of family working together!
Once the ends of the cattle panels were attached to 2 x 6 supports, Patrick and Bisser carried the cattle panels and inserted them into the square frame.
Voila! By the very evening we have a facsimile of a house! Hurray! That was quick!
Later on, the lumber attached to the cattle panels were screwed into the square base for added stability.
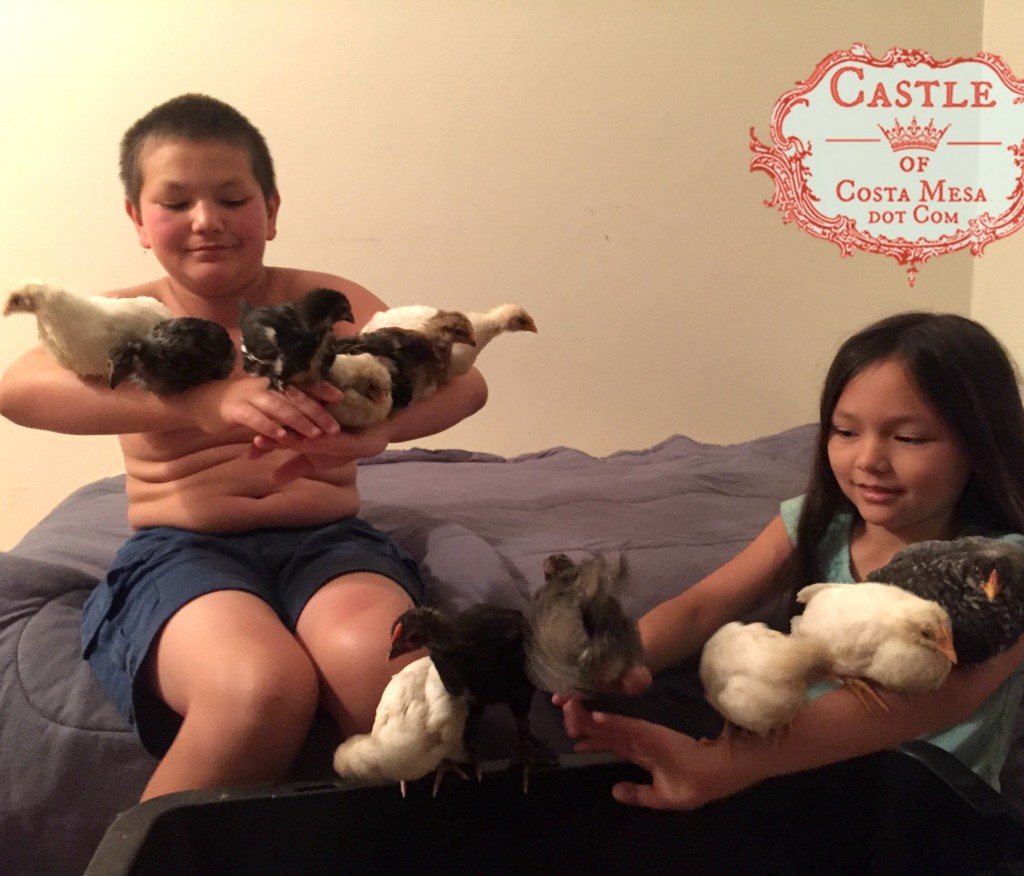
April 27, 2017. Happy times bonding with baby chicks. The chicks were getting bigger and were almost ready to sleep outdoors!
The Front of the Chicken Coop
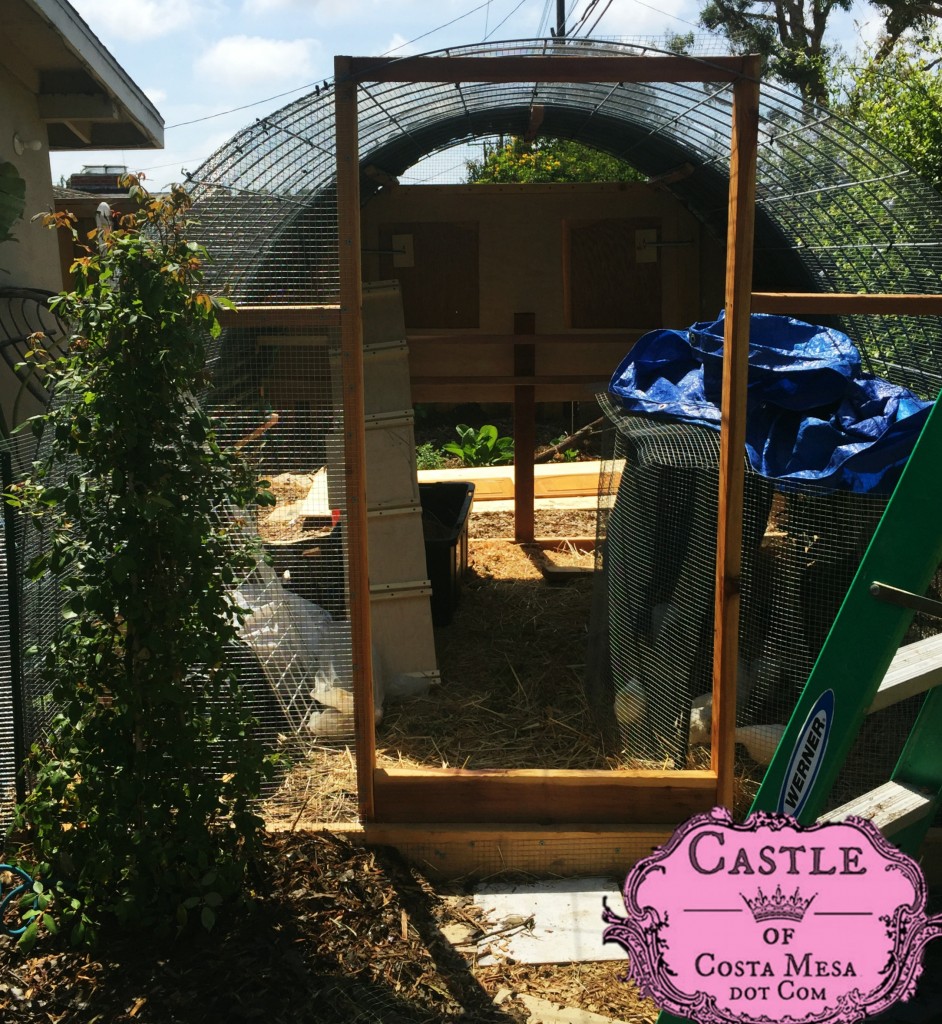
May 9, 2018. Door frame, threshold and coop-front horizontal support 2 x 4 bars have been installed.
The threshold of the door is high because we plan to use deep bedding for composting. The high threshold makes it possible to swing open and close the door without having it stuck into the deep bedding on the ground.
I made a decision for the door to swing inwards. I considered if I had to enter the coop at some point without the hens leaving, the inward swinging door may help deter chickens escaping.
I also made a pull string on the inside of the coop that will unlatch the front door, so that you can get out of the coop in case you get locked inside by mistake.
Note, the weather is warm enough now for our now older chicks, so we set up make-shift coops inside the unfinished coop for them to live in when they are not free-ranging.
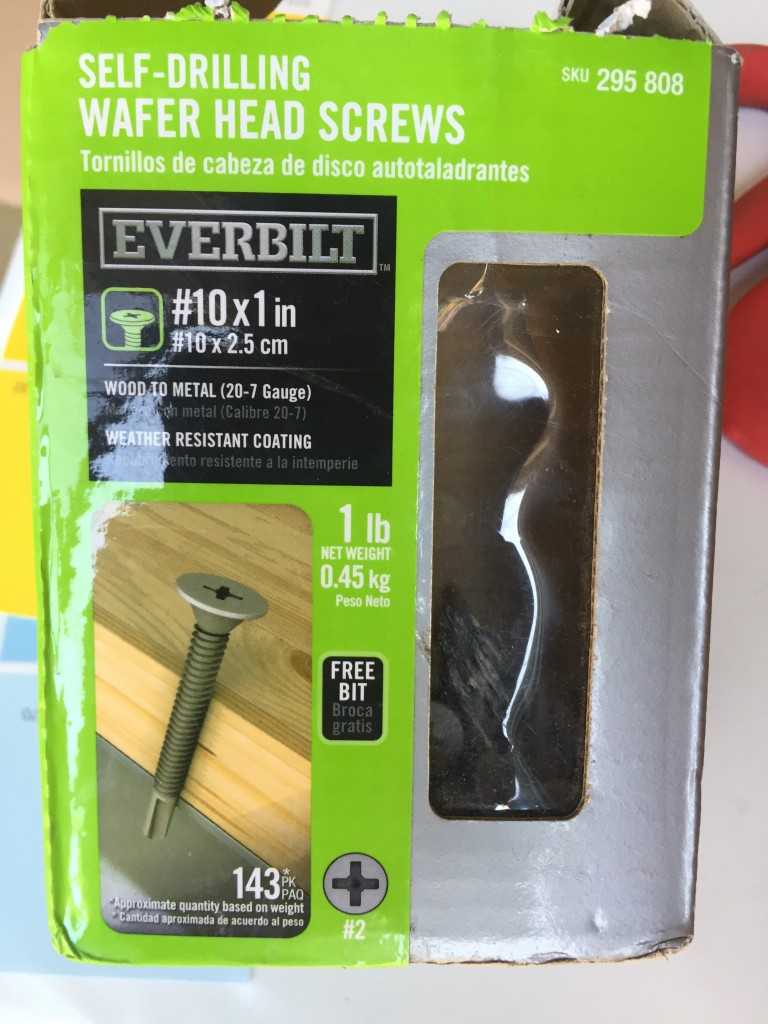
We used these self-drilling wafer head screws for easy attachment of 1/2 inch hardware cloth onto door frame and other wooden supports.
We buried 1/2″ hardware cloth into the ground to prevent burrowing predators from entering the coop.
Next, we cut out pieces of hardware cloths, using special wire cutters from Home Depot and draped the coop with hardware cloth to prevent predators from entering.
Securing the hardware cloth to the cattle panel and trimming off excess zip ties is a fun job that can involve small children.
It’s a two person job: One person works from inside the coop, the other feeds the zip ties from outside the coop.
My kids help zip tie the hardware cloth to the cattle panel frame, then trim off the excess zip ties with scissors.
Hen House: Windows for Egg Collection
Photo: April 21, 2020.
If a chicken coop is like a house, the hen house is like the bed room. The rest of the coop is like the living room. The bed room (hen house) should be dry, cozy, high up, private, have nice air flow and safe for the hens.
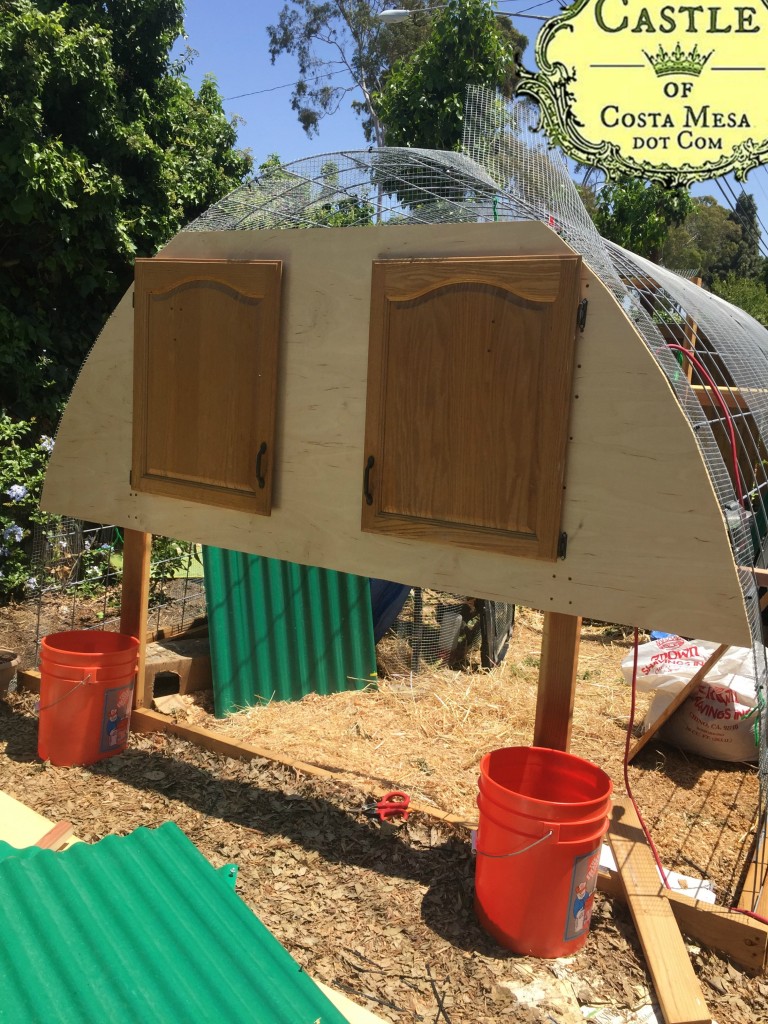
I bought 2 large plywood boards (thank you Danny for helping us haul that home in your truck) as the two walls of the hen house.
I bought a $5 jig saw from garage sale and proceeded to cut the 2 pieces of plywood into semicircles (as 2 walls of hen house) in the spirit of the hobbits. Orange Home Depot buckets served as supports to elevate the plywood for cutting.
Roost bar(s), hung high up in the hen house, for the hens to perch on and sleep at night. I imagine hens may find rounded roosts more comfortable to their feet, as opposed to rectangular beams. I used 2×2 redwood lumber for durability but later considered using as roost bars: moringa tree trunk, a tree branch, rounded pole for closet, any rounded beams.
I wanted the roosts to be hung and removable, for when I needed to enter the coop for cleaning or to access a chicken.
My removable roosts: I screwed in a 2″x3″ or so piece of thin plywood tab to each end of a 9 foot long 2×2 red wood lumber. The added tabs on each end of the lumber will hook onto the cattle panels, suspending the roost above ground.
Patrick was renovating our kitchen this summer, so I squirreled away some old cabinet doors to use as egg-harvesting windows for the back of the hen house!
Note: we carefully wrapped all possible predator entry points with 1/2 inch hardware cloth.
Post script on the egg harvesting window:
For the first year or so, my chickens do not lay eggs here. They lay eggs in the natural passion fruit vines nest in my “passiflora jungle” chicken run. We ended up having to do “Easter Egg Hunts” in our passion fruit chicken forest to harvest eggs. Now in 2020, the hens finally approve of the nesting boxes and use them more routinely.
My chickens adhere strictly to early bedtimes without me enforcing it. Whenever it gets a little dark, they run to go home to the hen house to sleep. We can spy on them through this hole without disturbing them!
April 2018:
Peeking into the hen house … President Warren (the plump Delaware hen) and Dr. Vandana (a Dominique hen) are getting ready to go to sleep.

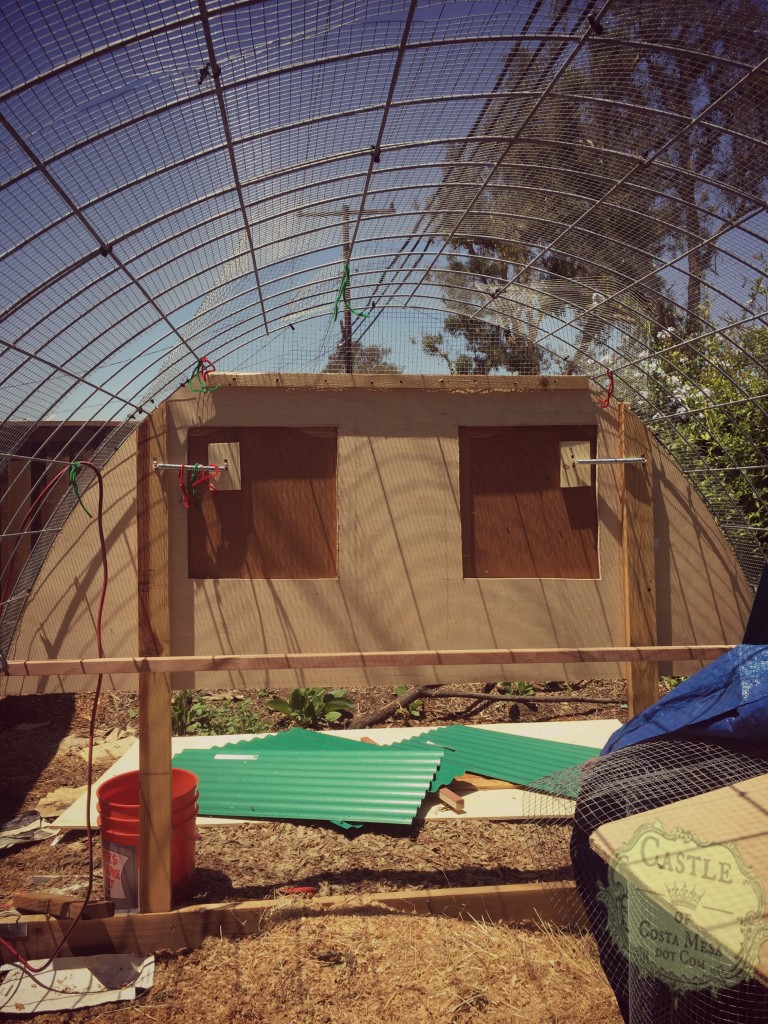
From the front view of the hen house, the wall consists of a double door (see below). The smaller one can be left open in hot summer for chicken and air to flow through. The larger door makes it easy for humans to enter the hen house to clean and do other potentially necessary work.
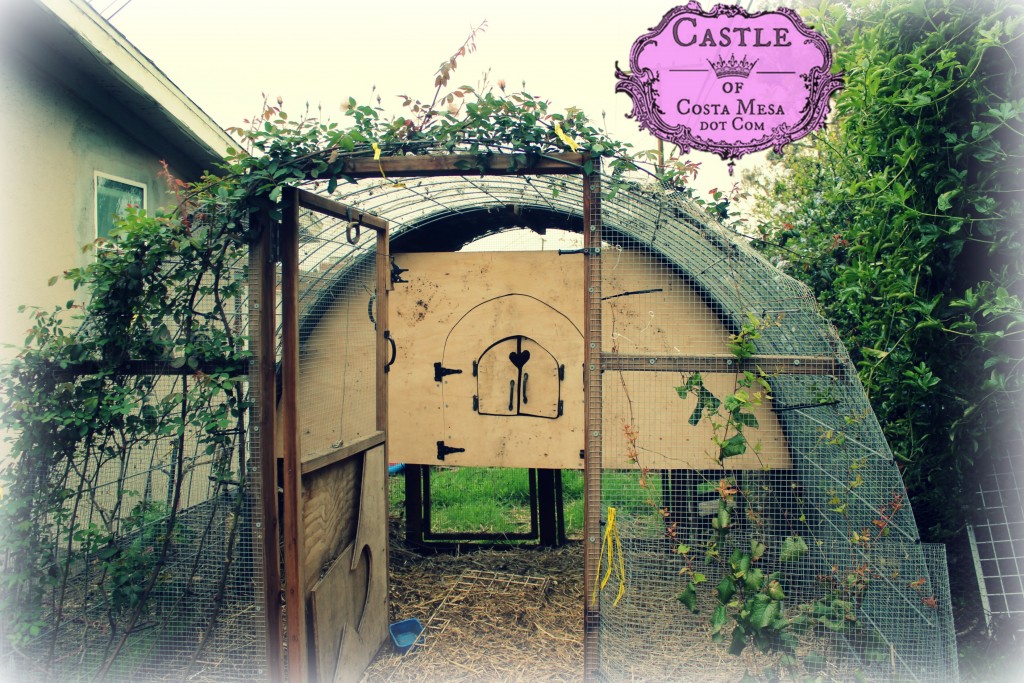
Photo: April 2, 2018.
Springs were attached onto windows for automatic closure, to prevent predators from entering. See below, view from inside the hen house towards the back of the coop.
Installing Corrugated Roof for the Hen House
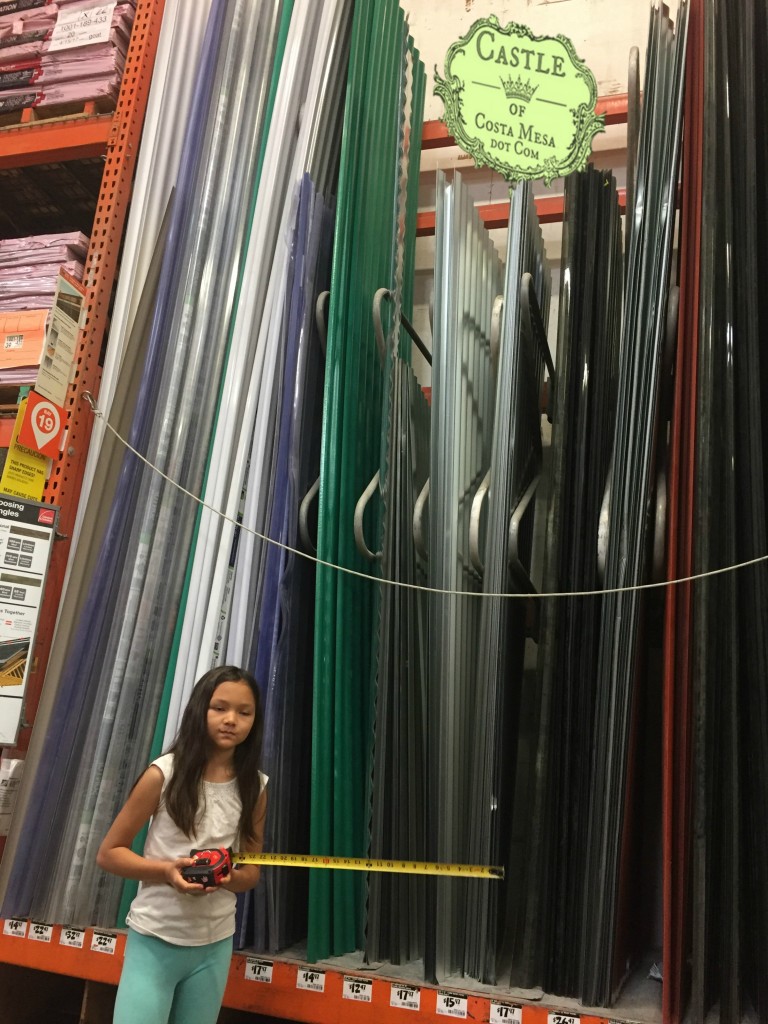
April 17, 2018. It is spring break. Nunu and I went to Home Depot to shop for the nicest color for the hen house roofing.
Uncut, the polycarbonate roofing piece is 10 foot tall. Thank you Danny for helping us bring the piece home in your truck!
Mermaid green. That’s it. That’s the one. $14.97 one piece.
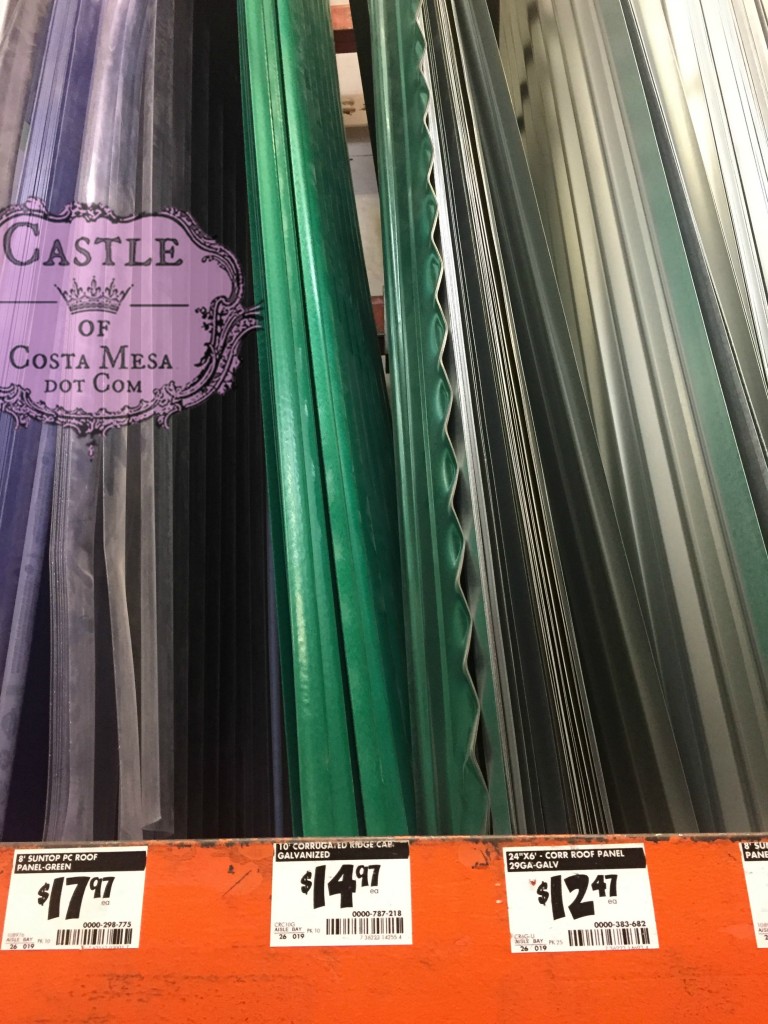
The 10 foot roofing was cut into 4 pieces of 2.5 ft each.
One cattle panel is 16 ft long. Our hen house is sited in the back of the chicken coop. The roofing is to cover the hen house from the ground on one side of the coop, up to the top of the coop and down to the other side of the coop. See photo below. This way the hen house is completely protected from rain.
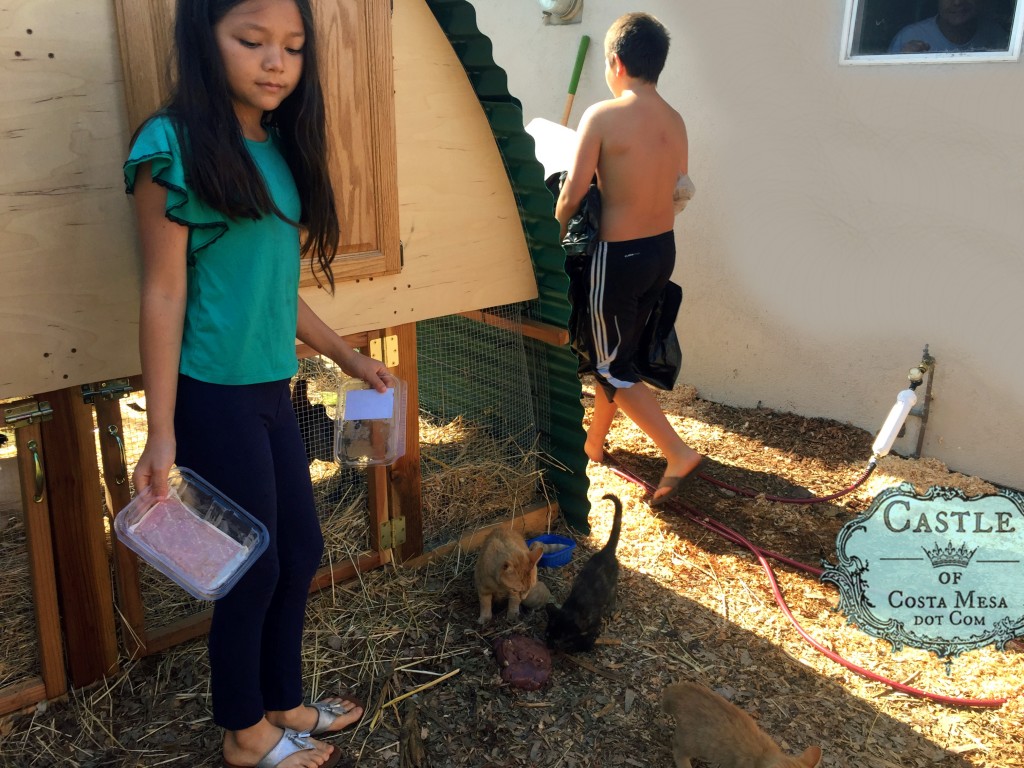
The roof will shelter the chickens from rain and the arch shape will score you points with hobbits and gnomes.
Securing corrugated roofing to the coop:
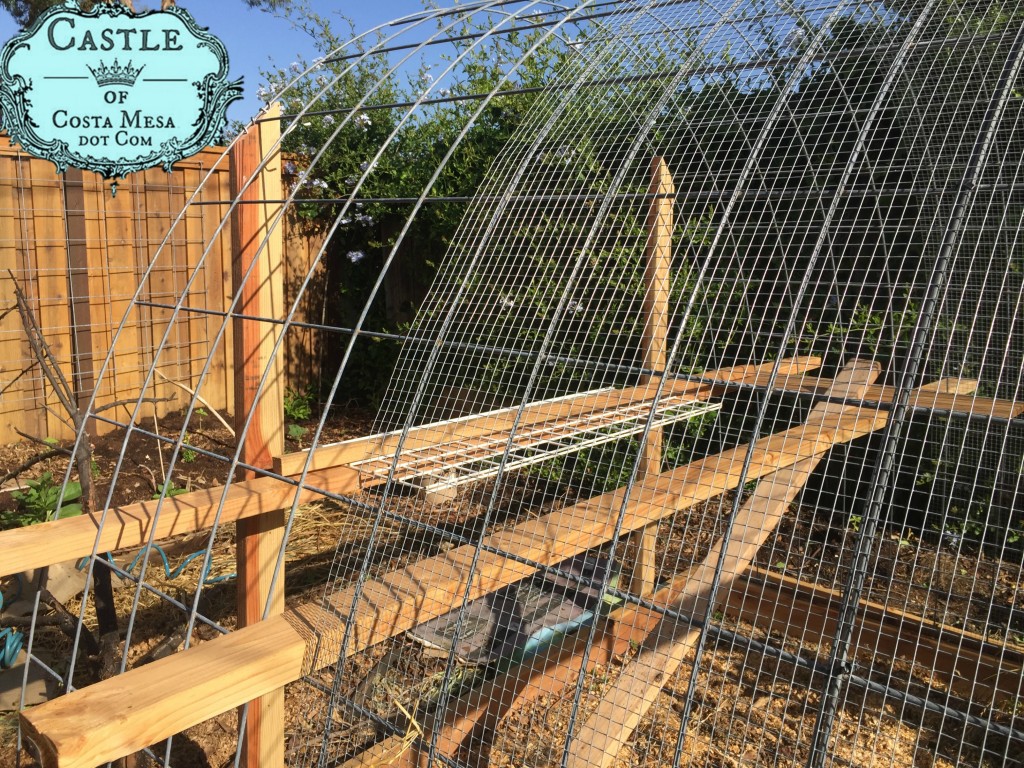
- I cut cheap 2×2 wooden beams into about 2 foot long pieces.
- I zip tied those support beams to the cattle panels at locations where the roofing panels will meet.
- I screwed in roofing panels sequentially onto the 2×2 support beams.
Photo of the roof, with fragrant Cecile Brunner roses, April 16, 2019. Note: only the back half of the coop, i.e., the hen house is covered with roofing. The other half gets dappled sunshine through the climbing vines.
Roosting Bars and Nesting Boxes inside the Hen House
April 28, 2017. I eyeballed the height of the roosting bars and nesting boxes, to make it easy for the youngest family member to harvest eggs in the morning.
May 8, 2017. Building nesting panels with removable partitions.
The nesting boxes have removable partitions for easy cleaning. Photo below: the nest guard has not been installed yet.
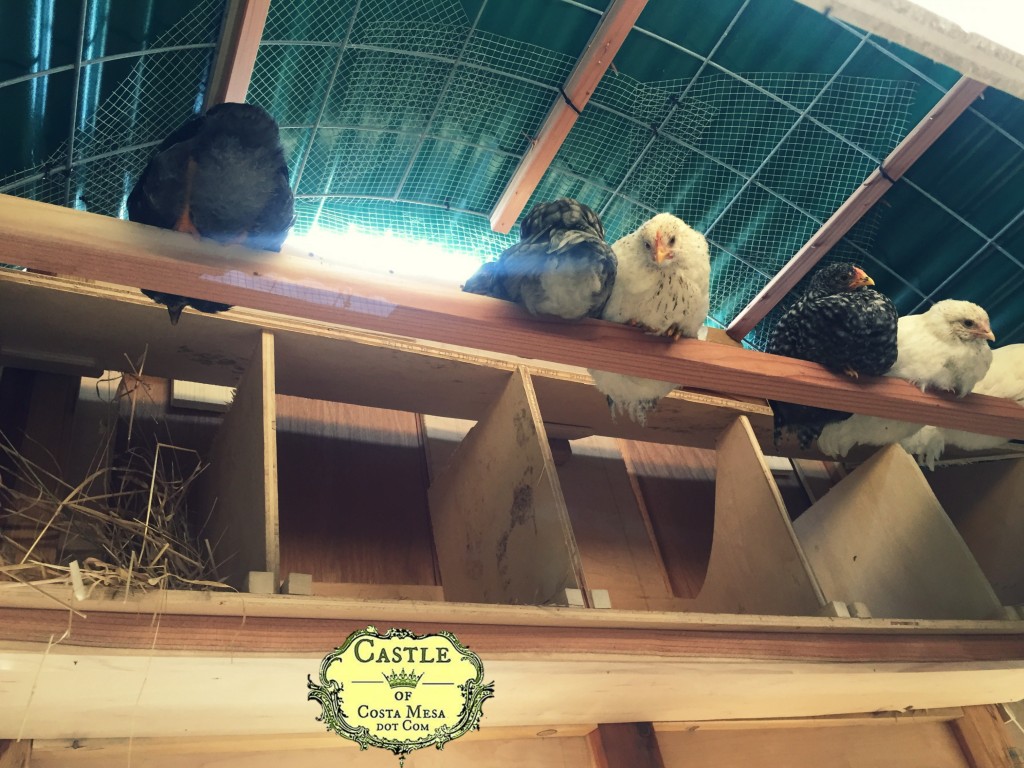
Most hens love to cuddle and sleep on the roost at night. Some prefer to sleep in the nesting boxes. April 2018 photo:
December 2017.
It would have been ideal if I had used round diameter tree branches as roosting bars. However at that time our moringa trees where still to young to be harvested, so we used 2 x 2 lumber instead.
by tagging in an extra piece of plywood to the ends of 2×2 roost bars, they were rendered movable. We can hook the roost bars onto the cattle panels or unhook the for easy removal.
Deep Bedding:
Soil Fertility, Composting Heat in Winter, Low Maintenance
The chickens are basically living atop a compost pile. We add alternating layers of green and brown organic matter to the coop floor and water the layers periodically to keep it damp for good compost to happen. We are careful cover up kitchen waste with leaves, hay or wood chips to prevent attracting flies.
We want our composting chicken coop to generate heat for the hen house in winter, thus keeping our hens warm. By spring, we would like to harvest that compost to use for our garden.
The floor of the coop rises and drops according to season. In early spring, the floor is the lowest because we would harvest all the rich, organic, black, earth-worm filled compost to grow heirloom tomatoes and other foods at home. By winter, the flooring/deep litter is the highest, (We would have been adding materials to the deep litter since spring) so the composting will keep the hens warm.
Here are some of the beddings we have used as deep litter:
- Most bottom layer (takes longest to decompost): Rough branches and leaves from neighbor Craig’s loquat tree
- Peterson’s Tree Trimming. Free wood chip mulch. If you have guests or someone you need to impress and your coop floor looks messy – cover with wood chips or hay. Pronto! They look more neat and presentable!
- Flattened cardboard boxes coz earthworms love them!
- Alena and Patrick’s gift of dry straw
- Gaby’s yard trimmings: fluffy leaves with pink bougainvillea
- Kathy’s freshly mowed grass! Must be organic.
- Straw, bought from The Feed Barn when I really need to cover too much nitrogen-rice kitchen scraps in a hurry.
- Dried leaves scavenged from the city.
- Organic produce salvaged from our favorite local grocery store and organic restaurant dumpsters to feed the chickens.
- This works only if you have a lot of carbon-rich materials to cover the nitrogen-rich, flies-attracting materials.
- We had mountains of carbon-rich wood chips from the tree-trimming service to cover the materials, to avoid breeding houseflies. I also get organic yard trimming (dry leaves, flowers, dry grass) from Gaby and Felix to cover these.
- Be careful to cover your nitrogen-rich scraps within 20 minutes or so to prevent flies!
- I love adding organic produce waste (otherwise destined for landfill) because I have been rewarded with so much rich compost by the next growing season.
- We even toss in dandelion, mallow and weeds here! (Don’t follow everything I say…)
- The thinking is that if the weeds sprout, they provide nutrition for the hens.
- If they do not sprout, by the end of the season, they become black compost for my garden.
- That said, I do have some dandelions growing in my garden bed. Could it be from this practice?
- Whenever we dump a layer of leaves, it is like Christmas for the hens! They scream with joy as they dive in and look for bugs. That is one of the reasons for keeping chickens.
- I also seed my deep-litter with big juicy earthworms from my vermicomposter. This way my chicken coop is also a vermicomposter! I water the coop floor periodically to generate moisture for my worm babies. I get tons of baby earthworms and eggs by spring.
- etc
Caveat: The chicken coop is now basically a compost-making machine that your hens just happen to live on. Just like any other compost pile, it attracts flies, mice and other unwanted visitors.
- The 1/2 in hardware cloths protects me hens from unwanted visits from mice, snakes, possums, raccoons, etc
- As for flies, I try to only add nitrogen-rich materials in the colder seasons and cover well within 20 minutes. If you do so in hot summer, you risk attracting a lot of flies unless you cover very well with wood-chips or other carbon-rich materials.
Zulaykha (Zuzu) modeling by the high pile of deep bedding (in winter we pile a lot of straw) right under the hen house – the deep bedding generates heat for the chickens who roost right above.
Growing Vines over Chicken Coop for
Beauty, Bugs, Shade and Foods
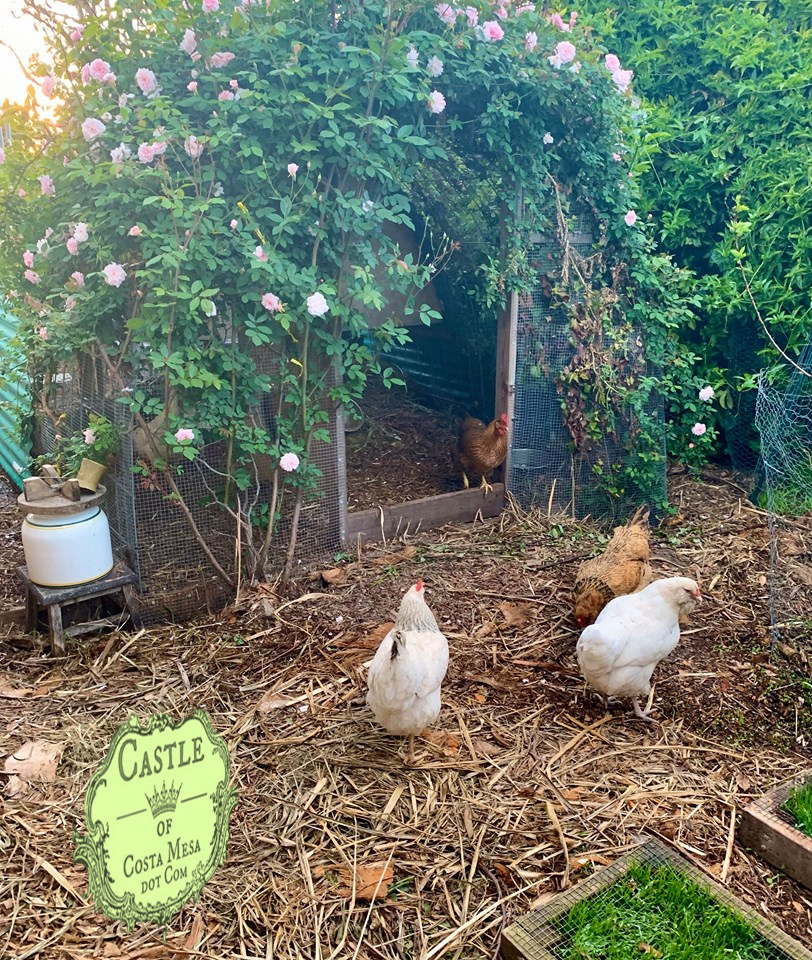
Photo: April 16, 2019.
I think a decidious food or fragrant rose vine is ideal to grow over the coop. In winter as the sun is low, the dropped leaves will allow more sun to reach the coop.
Vines that I have considered…
- Fragrant roses.
- We chose Cecile Brunner rose which is so fragrant (smells like french talcum, so special), prolific, repeat blooming. Most of the stems are *almost* thornless and they make great cut flowers in small cups. Downside: if unpruned, they become lankily octupusly and will grab you as you walk by to harvest eggs. Since I am short, I am unable to prune the top of the coop, thus the roses shoot straight up into the sky!
- I recommend you try the Lady Banks roses if you want a sigh-inducing once a year proliferation of roses without thorns or fragrance. Nah, go with thorns and fragrance!
- Loofah gourds.
- We planted this in 2017. It was too vigorous and engulfed the coop quickly, producing many gourds. The unpruned, overwintered loofah vine was bit too robust.
- Grapes.
- Gives lots of shade, leaves are deciduous in winter to let in sunshine. June bugs who come for the grapes will provide extra protein for the chickens.
- Passionfruit vine.
- We have 2 beautiful passion fruit vines growing at home, but their growth habits are too vigorous and will engulf the coop in weeks, so we decided against passion fruit for the coop.
- Black eyed susan vine.
- Sweet looking flowers, too vigorous, will cover the coop too quickly but does not produce food.
- Water melon.
- Needs to be carefully trained, melons supported – I am too short to train the melons to the top. Nah.
April 2018. Vihren harvested a basket of fragrant Cecile Brunner roses, grown from fertile chicken coop poop for his teacher.
How is My Coop Doing? Updates
Update: April 6, 2018 Photo
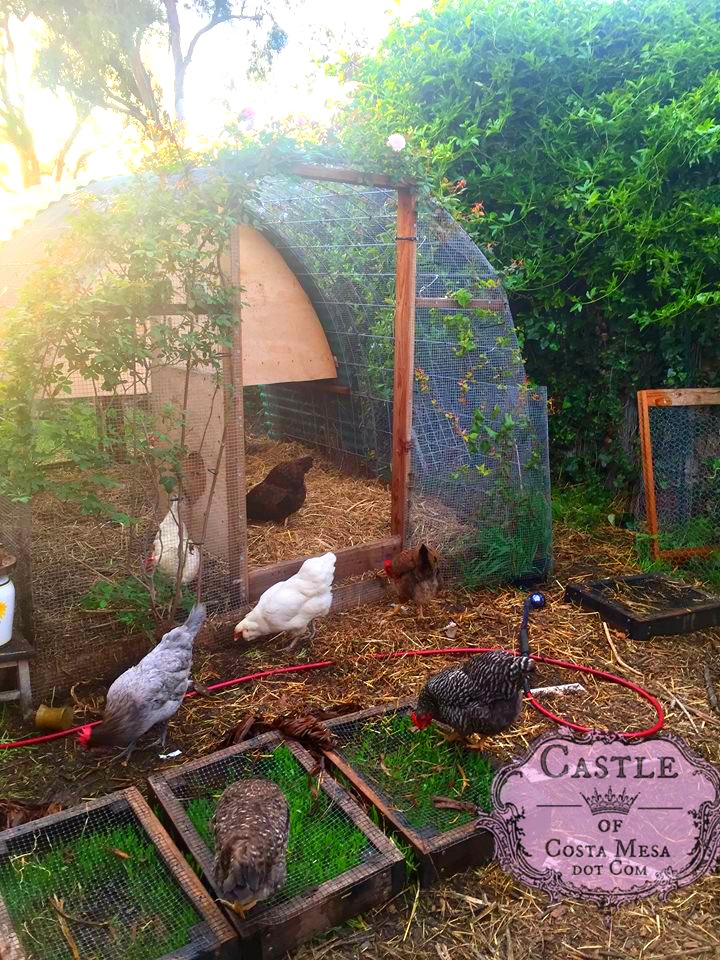
January 29, 2019. Harvesting Rich, Black Compost
This is such a hassle-free coop design. I almost forgot about it. January 30, 2019. Yesterday, my son Vihren and I harvested some dark, rich compost from the bottom of the coop and mulched our winter salad patch in the front yard. Look how black and gorgeous the compost is! WOW!
The chickens lined up to fight over the occasional fat japanese beetle grub found in the compost. Yummy.
March 9, 2019. Our front yard salad patch, grown with compost made in the chicken coop. See, you do not need to plonk your chicken coop on a sandy or cement base and diligently scoop poop daily. You can be lazy like me, build a composting coop, toss in leaves and compostable layers, let the hens bless the compost with their scratching and pooping and by the end of the season, you have WOW rich, black, earth-worm filled compost to grow your food!
April 22, 2020. Transforming chicken scratching and composting into luscious, delicious, healthy foods! In retrospect, I want to say, “This is an AWESOME coop!” I love the hobbit shape, it is so low maintenance, so easy, I simply LOVE it! – me, who built it.
I hope you find this blog entry useful. Do drop a line or two and share your thoughts with us.
If you make one, please share with me. You can post a photo here, tag me on Instagram @CastleofCostaMesa or post to Castle of Costa Mesa Facebook page. It will give me the jollies to see how an idea transforms when it passes through another life and hands.
Thank you! with love from our garden to yours ~ Jzin
You can follow us on Instagram: @CastleofCostaMesa
Feel free to support our endeavors by buy a poster or some handmade goodies from our Castle of Costa Mesa Etsy shop. Thank you!
Return to main page: Castle of Costa Mesa Urban Food Forest Garden in Southern California, USA.








Gabrielle
Incredibly helpful, what a great post! Thank you so much for sharing all your information, especially about which vines, it looks like you guys thought of everything! Thanks again for kindly sharing, Gabrielle
Holly Jakobs
Thank you so much for this thoughtful and generous post!
Maraia
This is fantastic! Thanks for sharing!
Brad
What was the cost of this build?
Julia Doemer
Jzin, you aRe quite amazing. This post will be my guide for building our Moon Cradle Kinderhaus chicken house.
So well Thought through and documented. Thank you. Your Friend Julia
jzinius
Please update me with photos of your Moon Cradle Kinderhaus Coop! I imagine the children must be so happy.
Cyara
Amazing!
jzinius
Thank you! I love designing and gardening is so creative.
Rose
How many rose vines did you plant?
jzinius
The soil is so fertile around the chicken coop. My one sweet and fragrant Cecile Brunner rose is enough to cover the coop and more, requiring annual pruning. I also have a lovely coral vine growing on the coop. Tip – grow thornless rose here if you need to move around without getting caught in brambles.
Emmaline Hamersly
Thanks, I’ve recently been looking for facts about this topic for ages and yours is the best I’ve discovered so far.